
Create the Entry
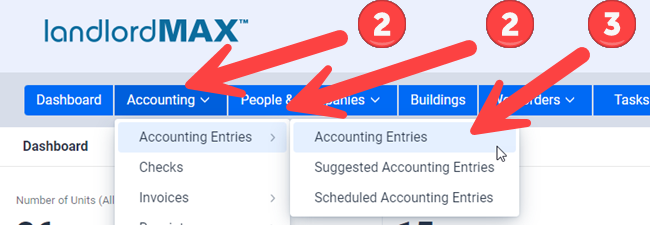
To create a new one-time Accounting Entry,  go in the Accounting menu,
 ![]() select Accounting Entries, and then
select Accounting Entries, and then ![]() select Accounting Entries. This will bring you to the main Accounting Entries table.
select Accounting Entries. This will bring you to the main Accounting Entries table.
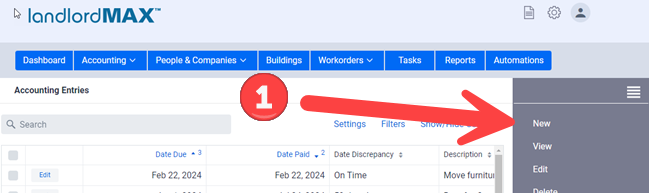
From here you can click on the New option on the top right (Please note that if you have the icons on the right side compressed that instead of the word New you would see a “+” icon.
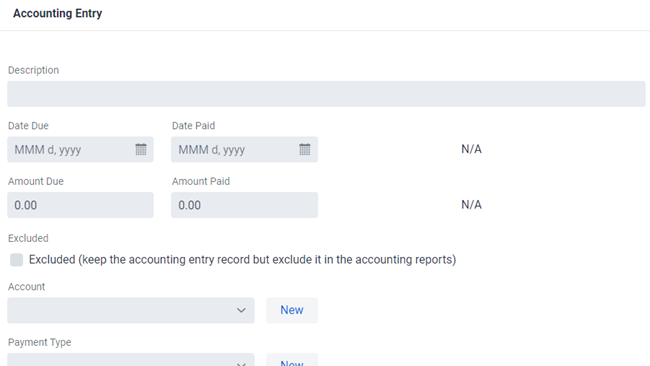
In the new window you will need to enter information about the new Accounting Entry.
** TIP: All fields are completely optional, meaning you can enter in as much or as little information as you wish. You can assign entries to tenants, buildings, etc. or you can decide to omit them. The same is true with dates, amounts, and so on. Everything is completely optional and up to you.
Enter Dates
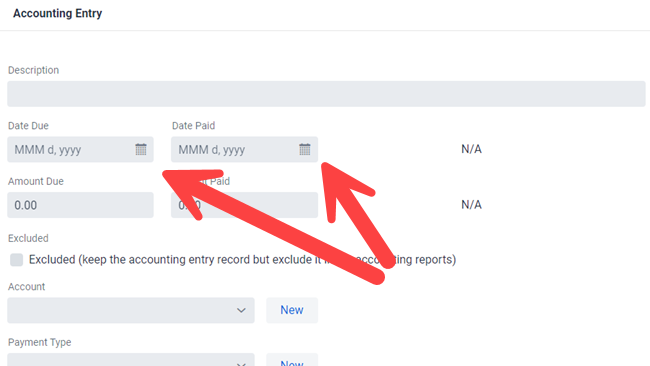
The date fields can be entered manually or with the popup calendar. The popup calendar is available by clicking on the icon on the right side of the date fields. If the dates are manually entered they must be formatted according to how their displayed (which can be set in “Your Settings”). In example screenshot the date format is MMM d, yyyy which means the format of Jan 20, 2021.
Along with standard Accounting Entries, you may also want to create future entries for future revenues or expenses. Examples of this could be future rents, future renovations that will due, and so on. In these cases, you will only enter in the Date Due and omit the Date Paid.
The Date Discrepancy in the Accounting Entry is the difference between the Date Due and the Date Paid and will be calculated automatically by the program. This value is especially important for some people in the calculation of late fees. In the above screenshot the values are shown as N/A as no dates have yet been entered.
Enter Payment
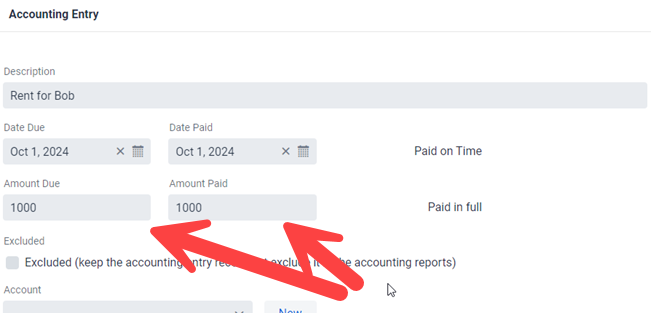
Similar to the Date Due field, the Amount Due field is really mainly there for informational purposes so that for example you can know when a rent was due, how late it is, and so on.
For Partial Payments you will want to use the “Partial Payment” option in the right menu just below the New button you clicked on earlier. This button will automatically split the partial payment for you into two entries, one for the amount paid now and one for the amount remaining. You can find more details on this and how partial payments works in the Partial Payment section of the user manual by clicking here.
So for example if you have a rent of $1000 due on Dec 1st where the tenant pays you $600 on Dec 1st and $400 on Dec 12th, then the partial payment button will automatically split this entry for you (again you can find more details in the Partial Payment section of the manual), one for the $600 and one for the $400 payment.
In other words you would have two Accounting Entries:
| Accounting Entry 1 | Accounting Entry 2 | |
| Date Due | Dec 1 | Dec 1 |
| Date Paid | Dec 1 | Dec 12 |
| Amount Due | $600 | $400 |
| Amount Paid | $600 | $400 |
| Amount Remaining | $0 | $0 |
If the second payment hasn’t yet been made (for example it’s just Dec 10th and the Dec 12th payment hasn’t yet been made), then the Date Paid and Amount Paid would remain empty for the second Accounting Entry.
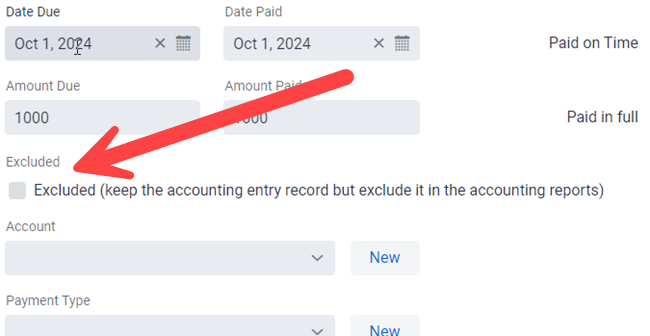
For non-payments you can select the Excluded checkbox. This option keeps the entry in the software but at the same time prevents it from appearing in all the reports. As well excluded entries can be filtered out from the main accounting table so that you can only view them as needed.
They are mainly used for example to store entries such as rents that may never be paid by the tenant, or that can be months or more before you can collect them. A good example of this is if you have to take a tenant to court for non-payment and don’t want to see the list of outstanding rents every day in your accounting table. This option allows you to keep them in the accounting section but not display them everywhere. This way when you finally resolve the issue in court, assuming they pay, you can then remove the exclusion flag and they will come back as general accounting entries.
Select the Account
You may have more than one Account to process a transaction (an Account can be a financial institution, it can be a cash account, it can be as simple as a budgetary account, and so on). If you’ve already created the Account you can just select it, but if not you can create a new one by clicking on the New Button to the right of the field. When you click on the New button pop-up window will open where you will enter the specific information about the Account. Please note that you can manage the list of Accounts in the Accounts section of the software, which are also found under the main Accounting menu.
Select the Payment Type
Next you can record the Payment Type for the transaction. In the dropped down list of this field you will find several default options to choose from such as cash, check, credit card, and so on. Please note that you can also create a new Payment Types by clicking on the New button on the right of the field. Similarly to Accounts you can manage Payment Types in the Payment Types section of the software.
Select the Category
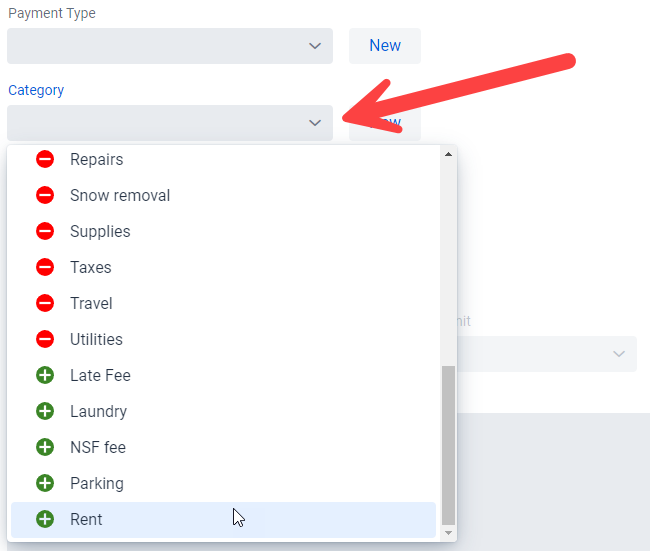
LandlordMax has a number of default Categories which for both revenues and expenses such as Rent, Insurance, Repairs, etc which you can select. You can however also create as many custom Categories as you need or wish by clicking on the New button on the right of the field. Again, similar to Accounts and Payment Types, Categories can then be managed in the Categories section of the software.
Categories will grouped together and color coded. As well all expenses appear above all revenues (in alphabetical order) so if you are looking for a revenue type it is on the bottom. This is intentional as most revenue entries are recurring such as rents and so will be automated through Scheduled Accounting Entries, whereas most one time entries will be expenses.
** TIP: Please note that if you start to type in the name of the Category in the field it will automatically find it and select it for you. In other words if you start to type “rent” you only need to get to “re” for the list to be limited to three options with “Rent” being one of them.
Select the Vendor, Tenant, Building, and/or Unit
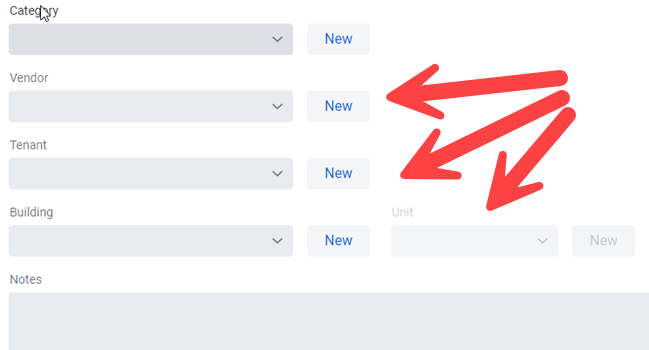
The last step is to associate the Accounting Entry to a Vendor, a Tenant, a Building, and/or a Unit. Again all fields are completely optional. Meaning that for rents the Vendor field will generally be empty. And similar to the categories, this will help group together related Accounting Entries for the reports such as trying to run the Accounting entries for a building report.
** TIP: When you select a building the software will automatically try to select the tenant residing at that location to save you from having to enter both. Similarly if you prefer to work from the building side then selecting the building and/or unit the software will then automatically try to select the tenant for you.
By clicking on the arrow of the respective field, you will find a list of the Vendors, Tenants, Buildings, and/or Units that you have already recorded in your database. If the one you are looking for is missing you can again use the New button on the right to create a new entry on the spot. Please note however that the popup will be limited in fields compared to the full view as tenants, buildings, and vendor data can be quite extensive. That is to say for example that the new Tenant popup will be limited compared to when you go to the Tenant’s screen.
** TIP: To enable the Unit field, a multi-unit Building must first be selected.
** TIP: Similar to the other fields you can start to type in a tenant’s name (or a building, etc.) and the software will filter the data to what you typed in. Please do note that you cannot manually type in a tenant’s name, you need to create a tenant entry and select it. The typing is only for limiting the list of tenants and buildings when trying to select them.