
Now that you’ve setup your first Building and Tenant, you want to keep track of the rents and expenses by creating Accounting Entries.
Although you can create automated recurring entries such as rents, mortgages, and so on, for now we’re mainly going to focus on manually creating Accounting Entries (one time Accounting Entries) and leave that more for the Creating a New Scheduled Accounting Entry section of the manual linked here.
Create a new Accounting Entry
For revenues and expenses you can create two types of entries:
- One-time Accounting Entry are for a payment or revenue that you will only have once such as fixing a toilet.
- Scheduled Accounting Entry are for any recurrent revenue or expense such as rents, utitities, mortgages, and so on. In essence anything that is recurring that you want to automate.
** TIP: Please note that you can create Scheduled Entries for amounts that fluctuate such as an electricity bill. In this case you just leave the Amount empty and fill it in when you know the amount.
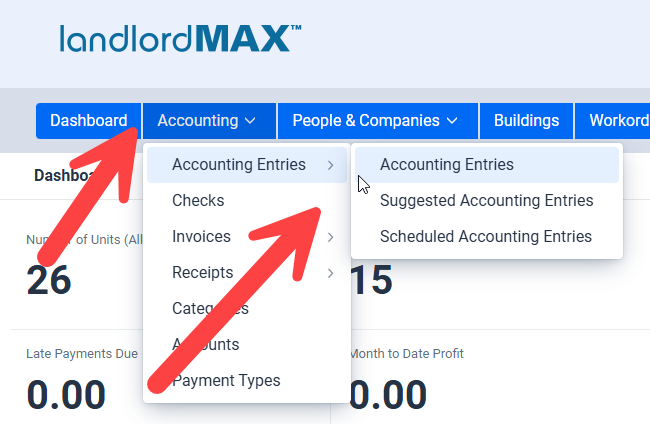
To get to the accounting section you need to go to the accounting menu by clicking on the Accounting menu button near the top of the screens. Under the Accounting Entries menu option you will find a further sub-menu, these are the different accounting sections.
They are:
- Accounting Entries – the main accounting section, where all the accounting data is located.
- Suggested Accounting Entries – the automated entries awaiting to be processed for your approval.
- Scheduled Accounting Entries – where you define the automated entries, when they are created and so on.
With that in mind the Accounting Entries is the area you are most likely to spend most of your time, this is where all your accounting data is located, it’s what is used by the software to generate the accounting reports, and so on. Again the details of the Scheduled Entries (recurring revenues and expenses such as rents, utilities, etc.) are being left to the Creating a New Scheduled Accounting Entry section of the manual
To view all Accounting Entries and/or to enter in a single Accounting Entry select Accounting Entries from the menu.
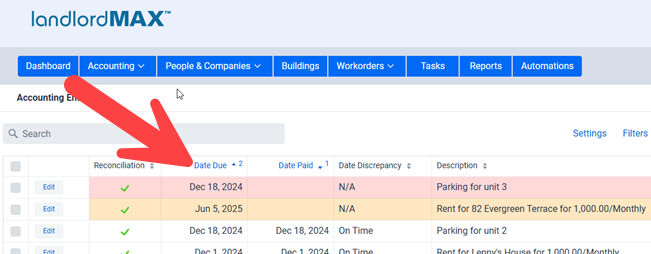
** TIP: The Accounting Entries include Color Codes which are a quick visual aid to determine the status of an entry. Specifically they are most commonly used to help determine how soon a rent is due to how late a rent is due. You can customize the colors and what they mean (how many days early or late). By default the different color code periods of lateness are up to 3 days late, up to 7 days late, and later than 7 days.

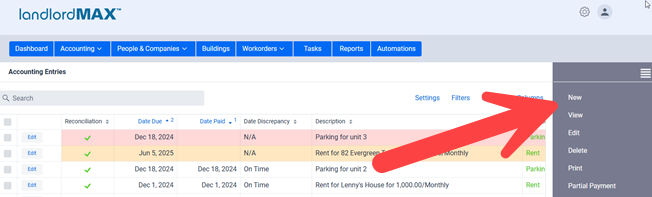
Getting back to the details of Accounting Entries, once in the accounting section click on the New action to create a new Accounting Entry.
Once you’ve clicked on the New action you will be presented with the form view for the Accounting Entry at which point you can enter in your Accounting Entry data.
** TIP: Please note that all fields are optional.
By default the system provides you with default Categories, Payment Types, etc. but if you want to create any new ones you can do so by clicking on the New button to the right of the field. You can also edit and manage the existing ones but that is beyond the scope of the Quick Start guide.
** IMPORTANT : Please note that some fields are comboboxes, meaning you can’t type in a value but rather need to select a value such as the Tenant field. Typing in this field acts as a search rather than the ability to manually type a Tenant’s name. So for example if you type in Bob Smith for the Tenant then it will search for the Tenant Bob Smith and select them if they exist. If they don’t exist then it will NOT create a new Tenant called Bob Smith, to do that you need to either click on the New Button besides the Tenant field to create a new Tenant and then select them.
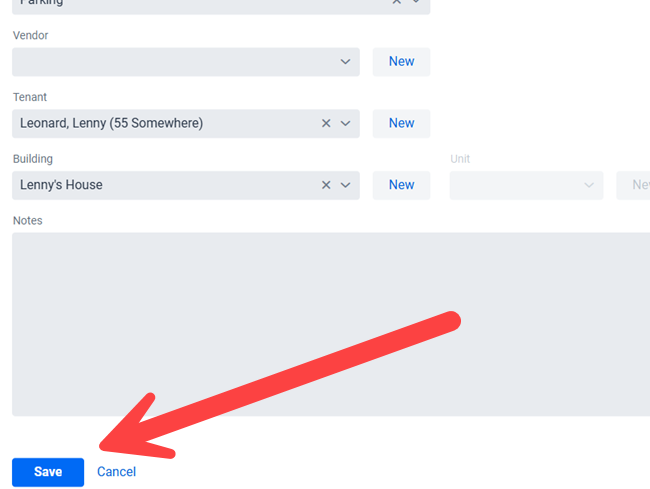
Once you’ve entered in all the data you want click on the Save button at the bottom of the form.
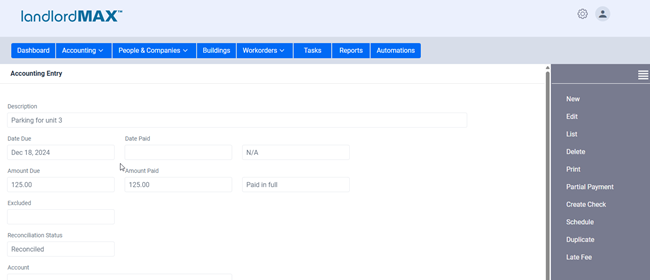
After the Accounting Entry has been saved you will be brought to the data view of the Accounting Entry.
From here you can perform all the different actions found on the right menu such as Schedule to create a recurring entry based on the current entry. You can Copy an existing entry if it’s very similar and you just want to edit some fields. You can apply a Partial Payment. You can apply a Late Fee if the entry is a rent and there is a relevant Lease in the system for the Tenant. And so on.

Before we conclude please note that you can also edit the entries directly in the table without having to select them and then go into the form view to edit them. You can edit an entry directly in the table view by either clicking on the Edit button in the left column or by right clicking on the entry as shown in the screenshot below.
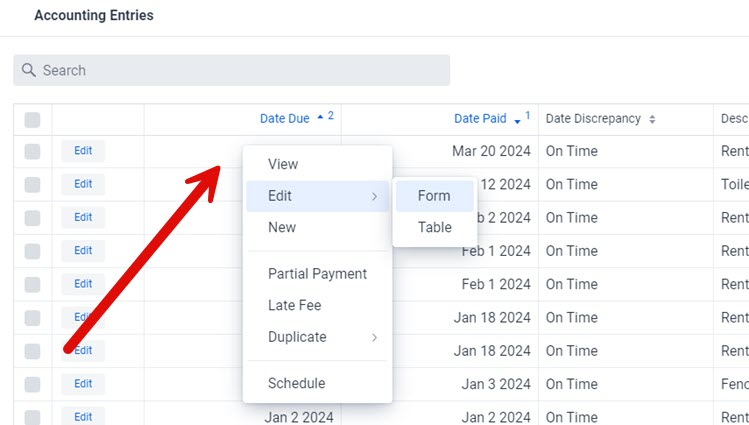
** TIP: Please note that if you right click on an action in the popup menu above that it will only affect the entry on which your mouse clicked and that it will NOT affect any entries that were selected/checked. This is because the right click is ONLY for the entry you’re mouse is over at the moment, which may or may not even be selected (sometimes you may want to perform a quick action without losing the list of entries you’ve already selected). If you wish to apply an action to more than one entry you need to select them and then use the menu on the top right.
You have now just created your first Accounting Entry and can generate accounting reports in the Reports section of the software.
** TIP: You can find more help on how to search and filter the Accounting Entries to help you find the specific entries you want in the Searching and Data Filters section of the user manual by clicking here.