
One of the first thing you will probably want to do when start using the software is to fill up the basic information about your properties, tenants and their leases. You can do this following the steps below for most of the different types of data across the application, beyond even the building and tenants even though for simplicity this is what we’ll be focusing on in this section of the user manual.
Create a Building
For those who prefer videos the above video demonstrates how to create your first Building.
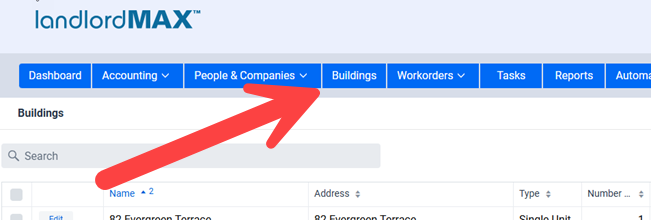
The first step is to get to the Buildings section of the software. To do this click on the Buildings menu item at the top of the screen.

In the Buildings section you then click on the New button.
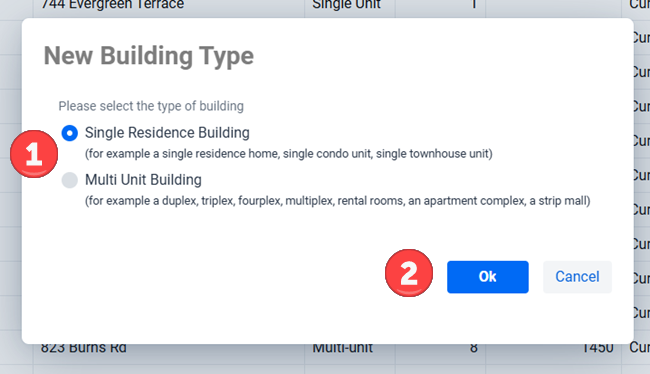
Clicking on the New button will result in a pop-up box asking you to select the type of building  as Single Residence Home or Multi-units building. Once you have confirmed your building type, press Ok
 ![]() .
.
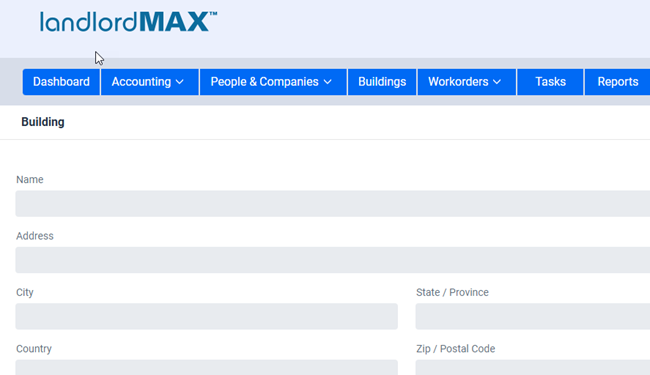
Once presented with the form enter in the building’s information as shown above.
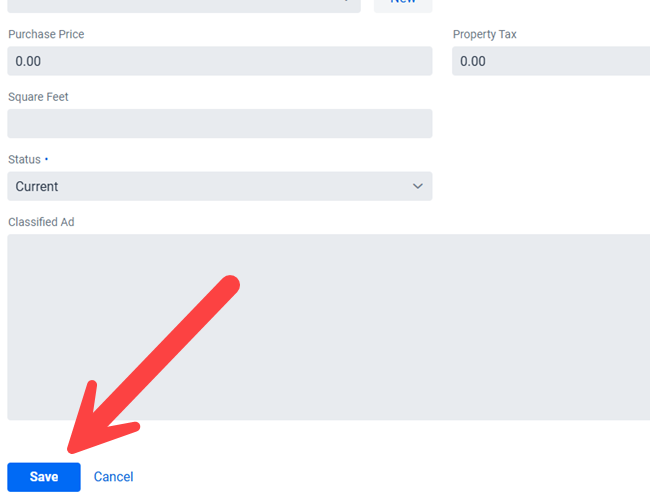
When you’re happy with the data you’ve entered click on the Save button at the bottom of the form to save the newly created Building.
** IMPORTANT: Please note that on some computers with smaller screens and monitors that you may need to scroll down to see the save button.
Create a Tenant
For those who prefer videos the above video demonstrates how to create your first Tenant.
Now that you have create a Building you’ll want to add Tenants to the newly created Building. Depending on the type of Building you may be adding just one Tenant or it could be many Tenants. For the purposes of the quick start guide we’re going to go over the simplest case which is adding a single Tenant. You can find more details on how to add Tenants in the Tenants section of the user manual by clicking here. And for more details on how to handle multiple tenants in the same units you can go to this FAQ page by clicking here.
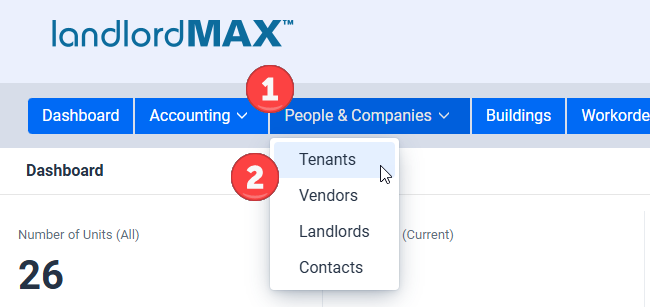
To create a new tenant, go in the Peoples and Companies menu and click Tenants ![]() . From there, select the New option from the right menu the same as for the Building.
. From there, select the New option from the right menu the same as for the Building.
In the bottom portion of the screen, there are many sub sections in which information concerning the tenant can be recorded. Please note that data in sub sections such as the Accounting, Vendors, Workorders, Invoices, Receipts, and so on are cross linked to other sections of the software. So for example if you have Accounting Entries in the main accounting section of the software that are assigned to the Tenant that they will also appear here. And similarly if you edit any of the Tenant’s Accounting Entries that these changes will be reflected in the main accounting section.
** TIP: When the Building is selected, the address for the Tenant will be automatically filled according to the Building information previously entered above. This data can be overwritten by simply typing in the values in the appropriate fields if they are different then the Building.
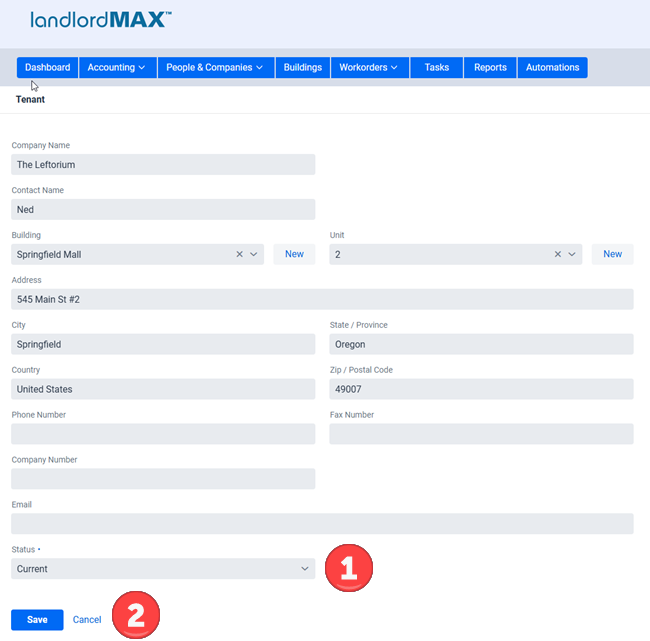
** IMPORTANT: Near the bottom of the tenant’s screen there is a Status field , this field is used to determine the Tenant’s status, specifically if the tenant is a current tenant, a past tenant, and so on. Setting the Status to Current tells the software that the Tenant is the currently residing tenant in that Building and/or Unit. When you are happy with all the information you have entered, click Save at the bottom of the page as shown in the screenshot below ![]() . If you then click on the List button on the top right menu you will return to the main Tenant table which lists all your tenants, which in this case will be just your new Tenant.
. If you then click on the List button on the top right menu you will return to the main Tenant table which lists all your tenants, which in this case will be just your new Tenant.
** TIP: The software is very careful about using the Status field for a number of reasons so please do note assume that just because a Tenant has a non-current Status that it may automatically affect other data. A good example of this is if you have to evict a Tenant and change their Status to Evicted, in which case the Lease is not altered in any way. Although the Tenant may have been Evicted the Lease may still be valid. In fact you probably want to keep the official Lease End Date intact, if you go to court you’ll need the proper Lease End Date and not the date when the Tenant was Evicted.
** TIP: We also recommend being very careful when accounting reports to NOT use the Status because you could accidentally filter out valid rents and so on. For example you may have Evicted a Tenant and if you only run the accounting reports for Current Tenant’s then any late rents they have will not appear in your reports as they are no longer Current. You can have similar issues with incoming Tenants that are not yet current with their first rent. Therefore we generally recommend against using the Tenant’s Status as part of accounting reports outside of very special situations.